iBwave Wi-Fi Mobile: Taking a Tour

Lately I’ve gotten a lot of questions about iBwave Wi-Fi so it seems like a good idea to put together a blog series covering all the different aspects of the iBwave Wi-Fi solution. Today I’ll start with iBwave Wi-Fi Mobile, but first let me describe the overall solution at a really high level.

What is the solution?
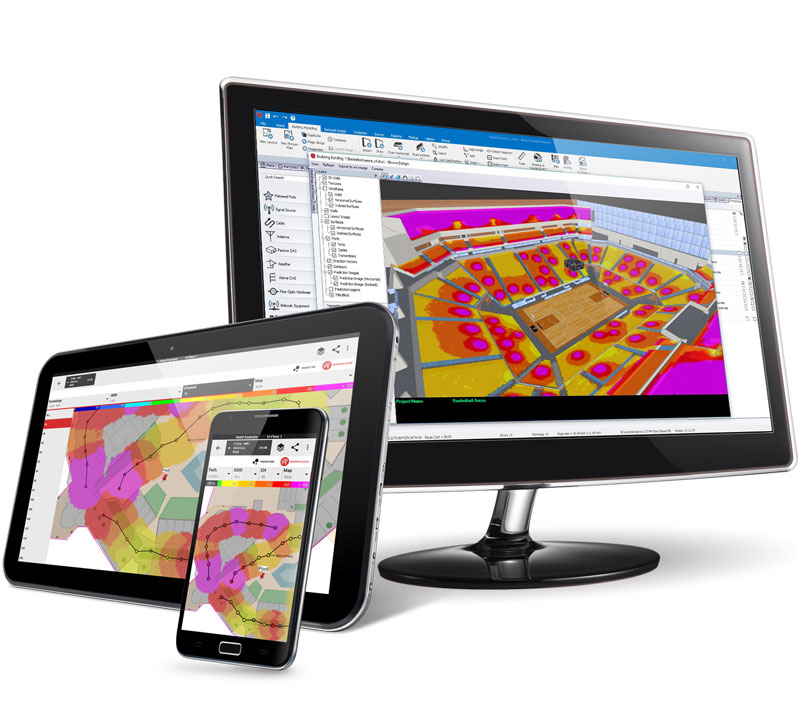
  • iBwave Wi-Fi Mobile
  • iBwave Wi-Fi (PC)
  • iBwave Cloud (10 GB)
  • iBwave Viewer (Free viewer)

Together, they are a connected solution to help streamline the Wi-Fi design life cycle from survey to planning to approval and eventually, maintenance and upgrades. And while each product can be purchased separately, customers see the most value when used all together.

Alright, let’s start the tour.

What is iBwave Wi-Fi Mobile?

Simply put, it’s a mobile app that packs a powerful network survey and design punch. You can use it on-site to do surveys, document your site notes, do simple design work, run heat maps, and run reports. It runs on any Android device – phone or tablet.

When we launched our mobile apps some years ago, the goal was to enable teams to better collaborate and to help simplify the survey and design process to save customers time. We wanted to deliver an app to make surveys more time-efficient, but that could also handle simple designs right on-site. The mobile app has been a big time saver for many of our customers.

Okay, let’s go through the major functionality of the app.

Here’s what I’m going to cover:

  • Surveying
  • Gathering Site Documentation
  • Modeling
  • Design
  • Heatmaps
  • Reports
  • Cloud Connectivity

Surveying

With the mobile app you can do both passive and active surveys using any Android device. This allows you to see coverage and throughput from LCMI (Least Capable Most Important) device perspective.

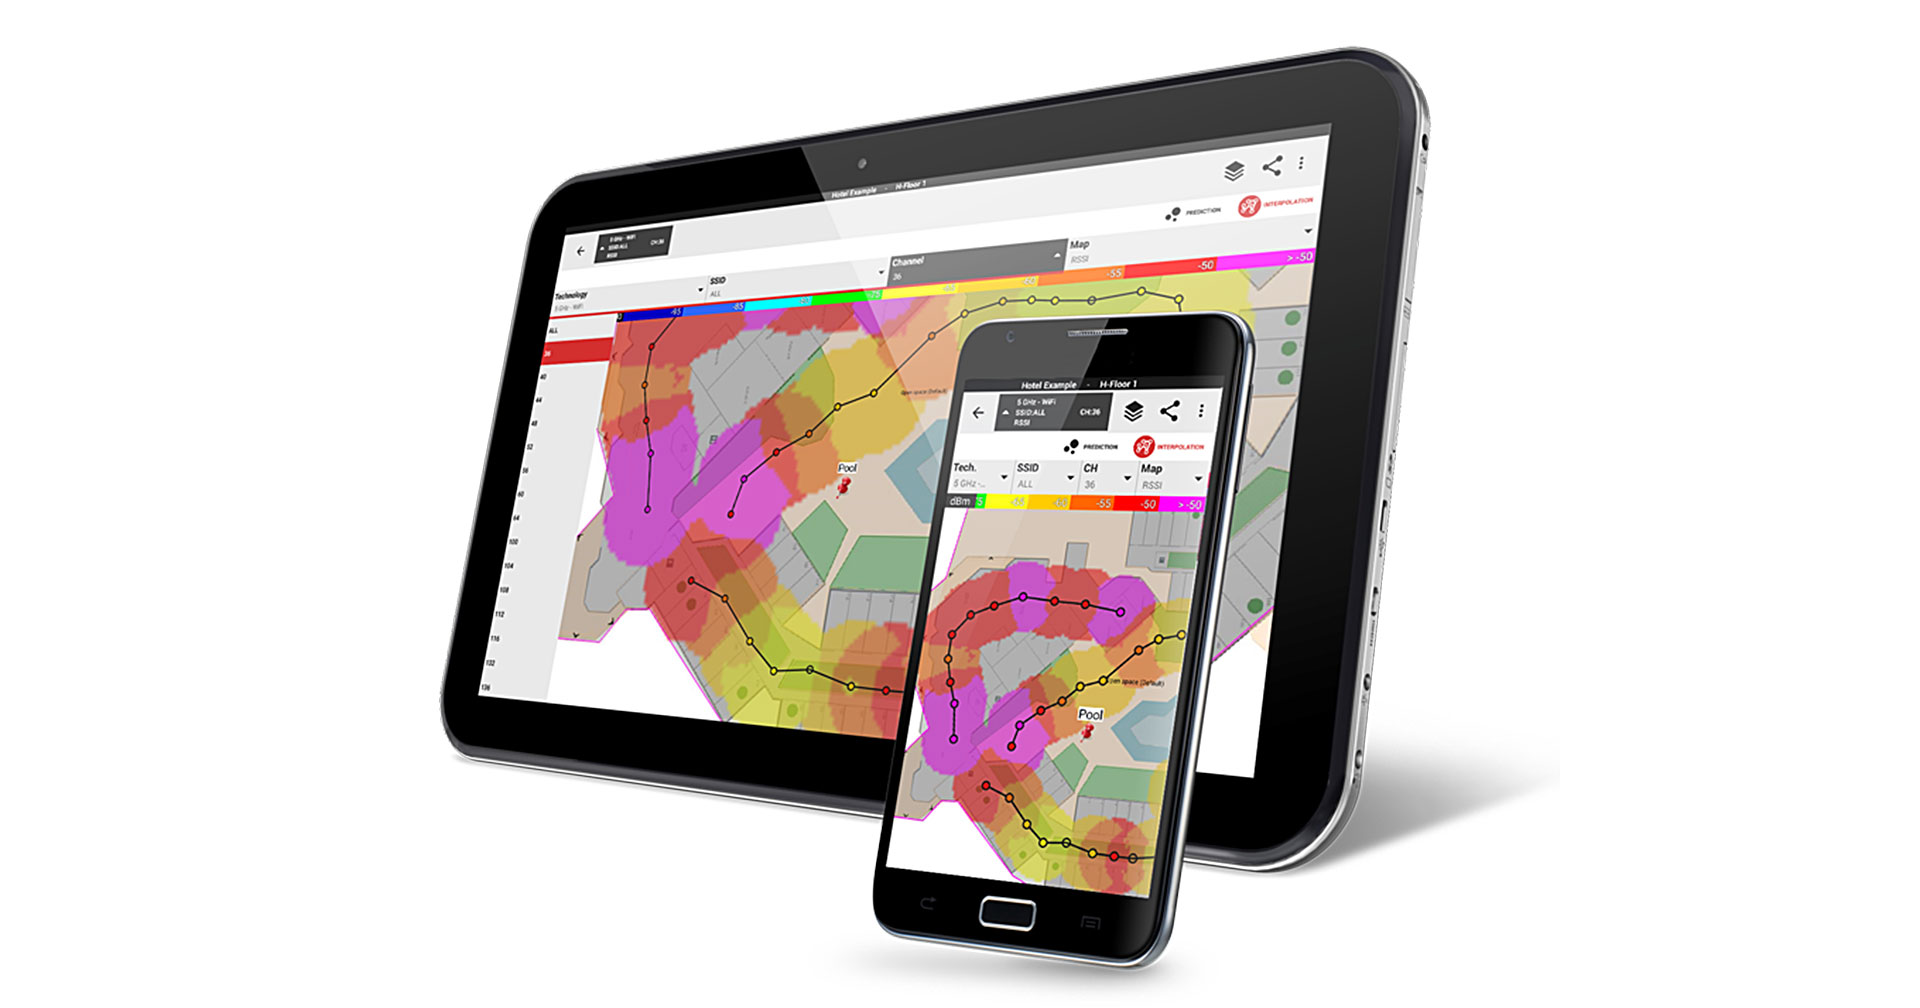
Here is what starting a passive survey in the mobile app looks like – in the video you will see me start a passive survey, which will capture SSID, BSSID, RSSI and channel number – and then at the end an interpolation heatmap can be displayed for RSSI and CCI.
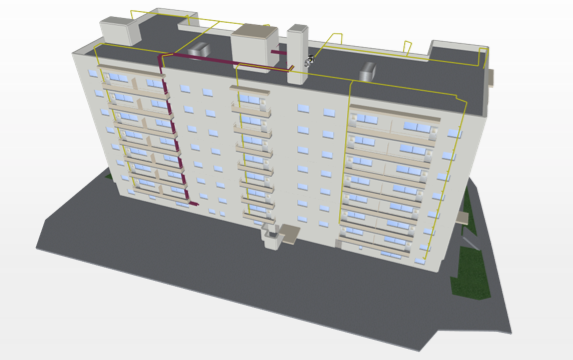
https://blog.ibwave.com/wp-content/uploads/2020/04/wifimobile-survey.mp4

Modeling

In the mobile app you can get a floor plan a few ways: you can take a picture of one, you can select a picture from your device, or you can download the project from the cloud with the modeling already done. But if you have no floor plan at all and need to quickly put one together, this allows you to rapidly draw one out .

Here it is in action:

https://blog.ibwave.com/wp-content/uploads/2020/04/wifimobile-modeling.mp4

Site Documentation

One of the largest pain points our customers had was documenting and then processing and communicating site documentation. Previously, on-site engineers would have to take a picture, document notes on a paper floor plan or excel spreadsheet, then go back over it all at the end and communicate it to the design team. Or, if doing the design themselves, inefficiently go back through everything.

With digital documentation, that’s all streamlined. Take pictures, videos, or audio notes that are saved to geo-located pins on your floor plan – add in annotations and written notes, and then save the project to the cloud where your team finalizing the design in iBwave Wi-Fi can see your pictures, notes, etc right on the floor plan.

Here is what that looks like:

https://blog.ibwave.com/wp-content/uploads/2020/04/wifimobile-documentation.mp4

Network Design

iBwave Wi-Fi Mobile goes beyond just being a survey app – it also lets you do simple design work while you’re on site. This can be so the engineer can do a preliminary design as they walk and see obstructions. It helps you avoid placing an AP where an existing obstruction exists and can also give you an on-the-spot idea of how the network will perform, once you run the heatmaps.

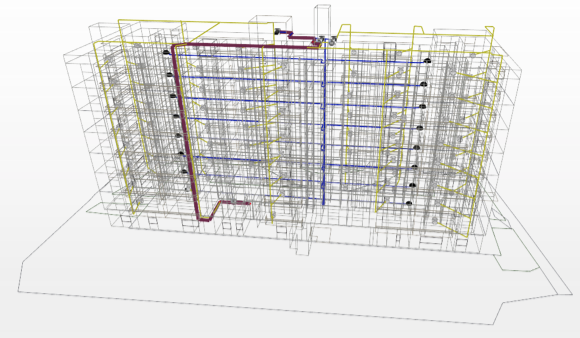
What can you design? You can do manual or automatic AP placement, auto channel assignment, the manual adjustment of power, channel and antenna orientation – and you can also route cabling and place network equipment like switches and routers.

Here is a simple demo showing the placing of two APs, a switch and then routing the cabling. If you model the cable trays in the mobile app as you walk the site, you can also use iBwave WiFi PC to automatically route the cabling for you between cabling trays. Read more about automatic cable routing.
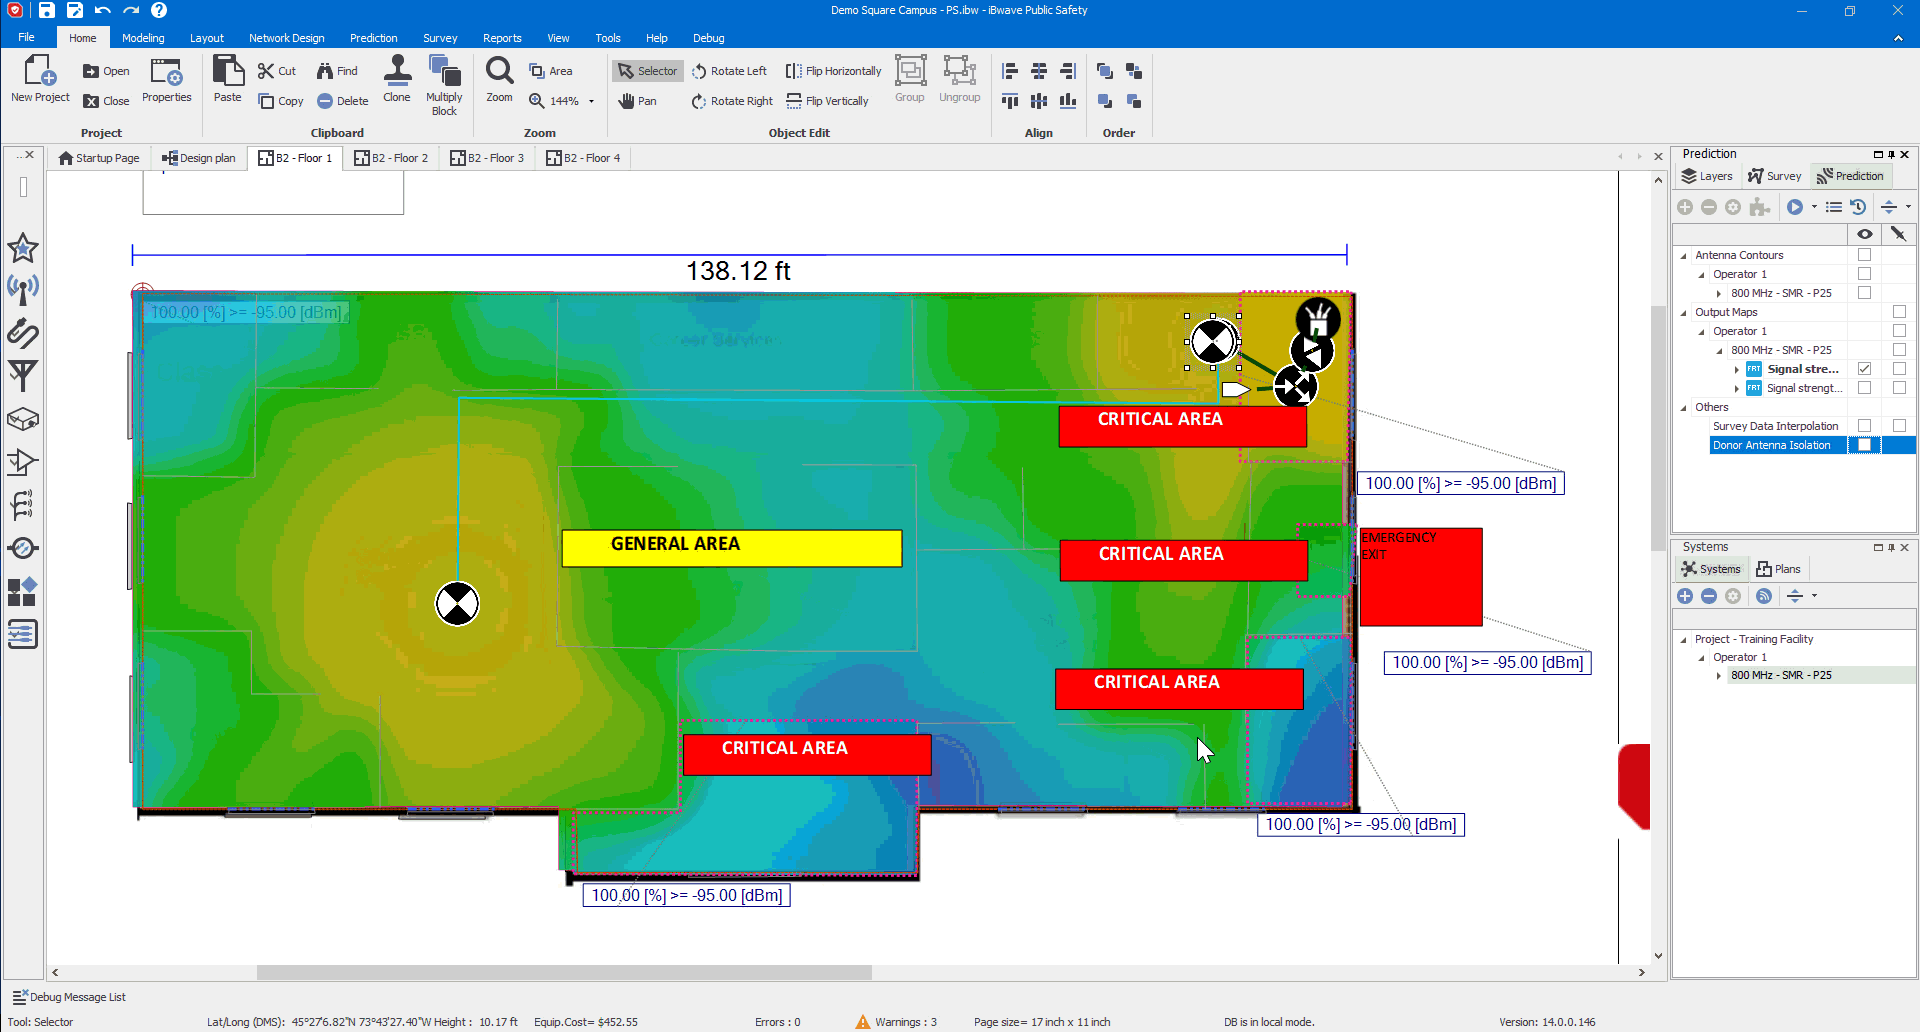
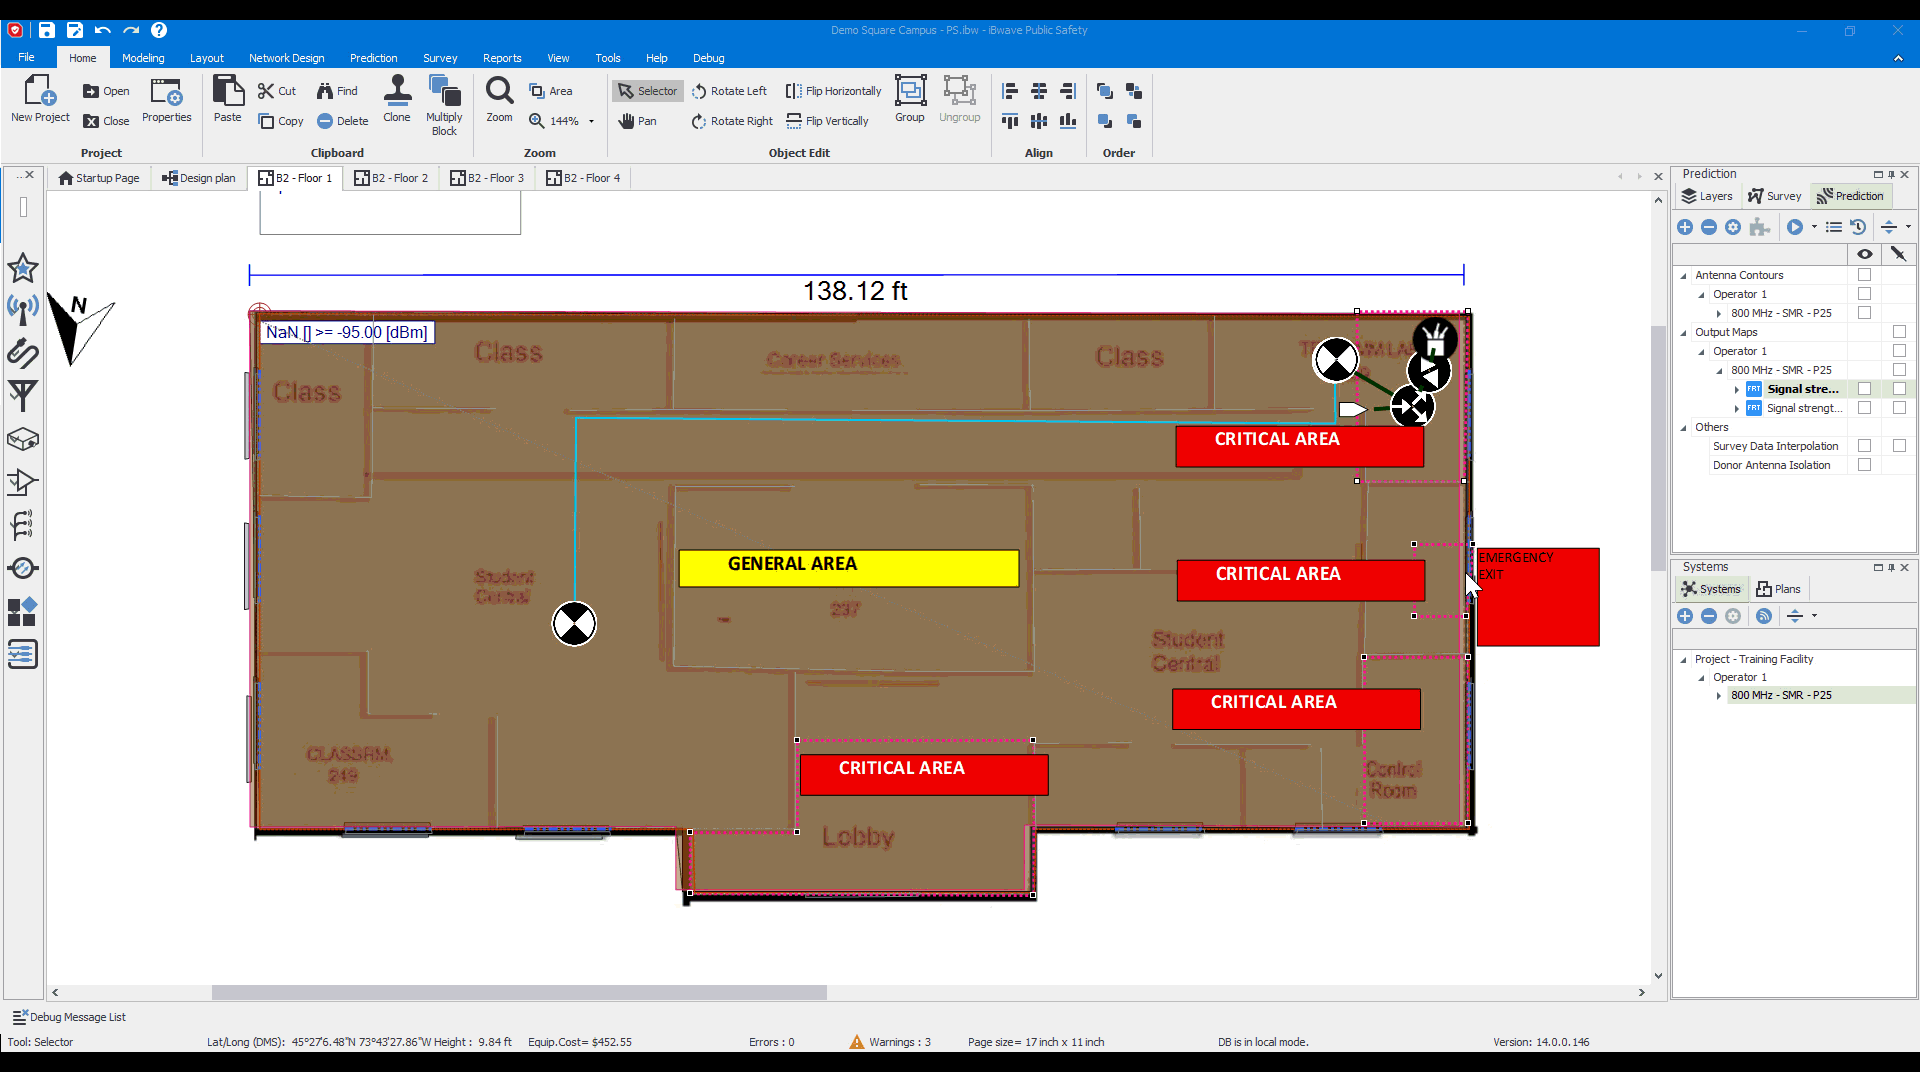
https://blog.ibwave.com/wp-content/uploads/2020/04/wifimobile-applacement.mp4

Heatmaps

With APs placed on the floor plan you can run prediction heatmaps while on site to get an idea of how your network will perform. Heatmaps available include: RSSI, Throughput, SNR, Overlap Zone, CCI, Capacity and more.

One question we get – how accurate is it? And the answer is – pretty accurate, but not as much as if you were using our PC version with 3D modeling and Fast Ray Tracing prediction algorithm. Instead, the mobile app uses an iBwave patented direct path model that can run prediction with user-defined RF propagation environments. Define the type of environment (semi-open, light, dense, very dense) and the algorithm uses it to run prediction of your on-site design.

Want to learn more about the different propagation methods in iBwave? Read my blog “No, Not All Prediction Methods Are the Same“.

Here are heatmaps in the mobile app in action:

https://blog.ibwave.com/wp-content/uploads/2020/04/ibwavewifimobile-prediction.mp4

Reporting

Reports are an important part of any network design project, so we were sure to include reporting in the mobile app. And while it is not as comprehensive as what’s in the PC version, what it does do is tie everything up in a configurable close-out package that comes as one document you can review with your customer, and even get their signature on.

Included in the close-out package report is:

  • Bill of Materials with cost details
  • Floor Plans
  • All annotations (pictures, vidoes, etc) with your notes and location on floor plan
  • Heat maps
  • Survey Maps

Each one of those gives you configurable options, and is optional to include in the package. So if you only want a BOM, or you only want reports for specific floors, or heatmaps, or bands etc. you can do that – it’s all customizable. You also have the option to include a Signatures page, in case you have opportunity to get sign-off while on-site.

https://blog.ibwave.com/wp-content/uploads/2020/04/wifimobile-reporting.mp4

Cloud Synchronization

The iBwave solution of iBwave WiFi Mobile + iBwave WiFi comes with 10GB of cloud storage so you can easily save your projects to files and work on them interchangeably between mobile app and PC. This enables teams to collaborate across locations on projects and overall has been a big time and pain saver for many of our customers. Use the mobile app onsite to do your survey, documentation and simple design – then save it to the cloud to either work on yourself later or to a teammate to finalize the design.

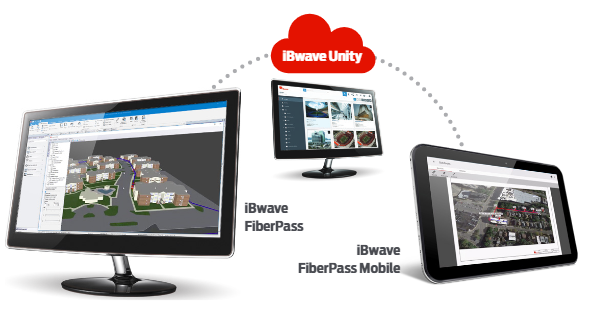
iBwave also offers a whole other cloud option called iBwave Unity, which I’ll cover in depth in another blog. But basically this is a SaaS based software that allows you oversight of all your projects from a single location. You can manage project workflow, cost reports, equipment lists, etc across all your projects vs. just reporting at the individual project level.

Wrap Up & What’s Next

So there you have it – a tour of iBwave Wi-Fi Mobile that covers all the main functionality. There are a lot more little things it does as well but this blog gives you a pretty good overview of the most key features within it. Admittedly, there are also some things it doesn’t do that our customers have asked us to look at – and while I can’t give away too many spoilers, know that improving the mobile app to be its best mobile app self, is on our list.

What do you think? What else can we do to improve the mobile app? Share your thoughts below.

Wirelessly yours,

Kelly

Meet iBwave Public Safety

While we have always been in the business of providing software to design Public Safety networks, it’s always been within the context of using our iBwave Design software – you know, the one that designs every wireless network under the sun.

But over the last couple of years, we started to notice an increase in interest in the design of public safety networks, and all you have to do is think about large emergency situations, think about the amount of data traffic – videos, voice, audio, and otherwise – flowing through the public safety networks between all first responder teams, and see why they are so important.

Simply put, without a well-designed public safety network, it can be extremely difficult for first responders to communicate vital information to and from each other. And when the ability to communicate in an emergency situation is compromised, so are people’s lives.

So Why Use this Software to Design your Public Safety Networks?

Some of you already familiar with iBwave might be wondering what’s different about this particular software – and the answer is pretty simple: it is targeted at those who are only designing public safety networks. And while you can still design public safety networks using iBwave Design, and all features in this software will be in that one – for those who only design public safety networks, this would be the best software for them to use.

Let’s talk about the specific public safety features we’ve added into this software, as well as iBwave Design.

Critical/General Zone Identification

In public safety certain guidelines need to be adhered to – in particular, you need to have -95dBM in 90% of ‘General’ area, and ‘Critical’ areas need to be -95 dBM as well, but 99%. With the new iBwave Public Safety software, you can identify both the ‘General and ‘Critical’ zones within your design and set the different compliance requirements for each area.

So for example, in the below – the ‘General’ area has been defined as well as select ‘Critical’ areas (equipment room, lobby, emergency exit, etc). Once that is done, you can right click on the area and select ‘Compliance Area Properties’ and then set your requirements for each area : General -95 dBm, 95% and Critical -95dBm, 99%. Then when you run your prediction, your compliance in each of the areas will show.

Here’s a short video of setting the different areas with different requirements. To do it you just select either one area, or all the same areas, right click and set up the compliance criteria. Then when you run your prediction, you will see the compliance labels telling you how they will perform.

Donor Isolation

A common challenge is feedback because you don’t have enough isolation between your donor and serving antennas – the donor antenna often picks up the signal of its own DAS network almost as clearly as the macro signal, which causes a feedback loop and renders the network unusable. A big problem when designing public safety networks.

To know things will work as they need to, guidelines are in place that stipulate you need -20 dB of isolation between donor and server antennas. To help with this, we’ve added this new ‘Donor Isolation’ feature which will calculate and show you the isolation dB and whether it meets the criteria of -20.

Here’s a short video showing you this. In it, I just go over to the predictions area and select ‘Donor Isolation’ – from there I can validate my design, and it will give me a result. As you can see the result shows -17.41 dB, which does not meet the -20 dB guideline and therefore it’s a fail. In this case, you would know you would need to adjust your design, and re-validate until you get a pass. Unfortunately, the feature to print a smiley face sticker out when successful didn’t make it into this version.

What’s Next for iBwave Public Safety?

The new iBwave Public Safety software is a great start, but it’s just that – only the start of what we intend to be a long roadtrip along the public safety highway. We’ve got a roadmap, we’ve got a development team, and we’ve got great customers to give us the right input to keep improving.

Interested in Learning More?

You can read all about iBwave Public Safety by heading over to the product page, found here. From there you can take a look at the datasheet, watch a demo video of it in action, and reach out to our team with any specific questions you may have.

Wirelessly yours,

Kelly

How FiberPass Reinvents FTTH Design

We’re bringing the good fibes!

The demand for ultra high-speed wireless access in the home has never been greater. Major operators are rushing to deploy fiber to apartment buildings, townhouses, and residential areas around the world to satisfy the public’s appetite for breakneck internet speeds.

At iBwave we recognized this demand and recently launched FiberPass, an innovative design solution for fiber deployments in multi-dwelling units.

What exactly is FiberPass? It’s the go-to solution to dramatically accelerate design and deployment for Fiber‑to‑the‑Home (FTTH) network projects.

Developed with FTTH design principles in mind, and with input from major telecommunications operators, FiberPass has simplified the entire fiber deployment lifecycle – from initial design to follow up maintenance.

FiberPass Streamlines Every Step In The Network Design Process

Previously, the process for designing and deploying a FTTH network was cumbersome and time consuming. With go-aheads required from different project managers – from operators to property supervisors – past FTTH design projects spent months in limbo waiting for approval.

Property managers were concerned about the effect that FTTH deployment had on tenant disruption, building aesthetics, and time requirements. Each time a change was requested, a new approval was needed.

Before FiberPass, some buildings took up to nine months after initial design before the FTTH network was finally approved. Meanwhile, operators were sinking time and money into projects with no completion in sight.

To make matters worse, design software was also fragmented. Engineers were using a variety of programs and devices to perform site surveys and compile data. Without an all-in-one design solution, synchronizing, organizing and communicating project information posed a significant challenge.

To solve these issues, iBwave worked closely with operators and property managers to understand and ultimately come up with a solution. The result is FiberPass, a software solution that speeds up FTTH design time by 300%.

FiberPass changes the landscape of FTTH design in several ways, and the benefits start right from project conception.

When engineers use FiberPass on mobile to perform site surveys, they’re able to complete up to 80% of the design right on the tablet. With the ability to take photos and annotations while surveying, engineers can compile information for property managers about aesthetics, tenant impact, and unique challenges in a building’s design all in the same application. Best of all, FiberPass can generate beautiful 3D building plan virtualization, giving property managers a convenient and detailed look at the network design.

iBwave’s 3D Virtualization in Action

Once a site survey is completed, FiberPass can generate an electronic sign-off document to send directly to property managers for approval. If changes are requested, an engineer using FiberPass can often accommodate inquiries during the initial survey. That’s a dramatic change from previous design practices, where multiple surveys would need to be conducted before a project could move to approval and deployment.

That’s not the only way FiberPass saves time. There’s a host of built-in automated report generation tools to simplify FTTH design. The Bill of Materials, Approval Sign Off, and Equipment List reports can all be generated instantly to provide property managers with the information they need to validate a design. If an approver is offsite, iBwave Unity’s cloud connectivity ensures they’ll be still be able to immediately access any information shared by the engineer performing the site design.

The FiberPass Product Ecosystem

Fiber networks often require specialized equipment, but with over 22, 000 vendor modelled parts and the option to add more as needed, iBwave’s component database has you covered. Being able to easily find the part needed to complete an FTTH design without leaving the application has a huge impact on efficiency and shortening design time.

How does all this time-saving add up? Since adopting FiberPass, operators have been able to:

  • Remove 4 day backlogs after site surveys (From 4 days to 3 hours)
  • Remove 6 day backlogs during Design process (From 6 days to 7.5 hours)
  • Reduce time to approval from 15 hours to 3 hours

We’ve barely scratched the surface of all the great features included in Fiberpass. To learn more about all the things the software is capable of, check out the FiberPass product page.

Thanks for taking the time to learn more about FiberPass and FTTH. Let’s keep spreading the fibe!

Exit mobile version